Run Multiple Claude Code Agents in Parallel with Git Worktrees and Automation
This article was generated automatically by an agent in Publish Owl. The agent used two steps: a "youtube" step that gathered the transcript, and an LLM step that took the transcript and wrote a well-structured article. After the article was written by the LLM, the youtube step used an LLM to decide what sections needed a screenshot from the video, and then automatically extracted frames from the video at those moments and inserted them into the article. The featured image is based on an Image Template that puts the first two frames side-by-side. This is just one example of what you can do with Publish Owl. Enjoy the read!
-----Using Claude Code as an autonomous coding agent can speed up large tasks. Running multiple Claude Code agents in parallel requires isolating each agent's workspace so agents do not edit the same files on the same git branch. This tutorial explains how to use Git worktrees, how to organize them, and how to automate the workflow so multiple Claude Code sessions can run concurrently without causing branch conflicts.
Problem overview
Running multiple terminal tabs or multiple instances of Claude Code against the same repository and branch causes conflicts. Each agent will edit the same files on the same branch. This makes merges painful and blocks productive multitasking. The goal is to run each Claude Code agent in a complete copy of the repository, on its own branch, so work proceeds in parallel on separate file trees.
What are Git worktrees
Git worktrees create a copy of the repository files in a separate directory while keeping git metadata linked. Each worktree can be checked out to a different branch. This gives each agent its own file set and branch to modify, avoiding direct conflicts with the main working tree.
Key properties
Full code copy: The entire codebase is copied into the new worktree directory, including folders and files.
Independent branch: The worktree checks out a new branch so commits occur on that branch only.
Merging back: When work is complete, merge the worktree branch into the main branch as with any feature branch.
Basic example: create a worktree
Assume the main project folder is music-shop. Create a sibling folder for worktrees named music-shop-worktrees, then add a worktree and a branch named feature-name:
mkdir ../music-shop-worktrees
git worktree add -b feature-name ../music-shop-worktrees/feature-name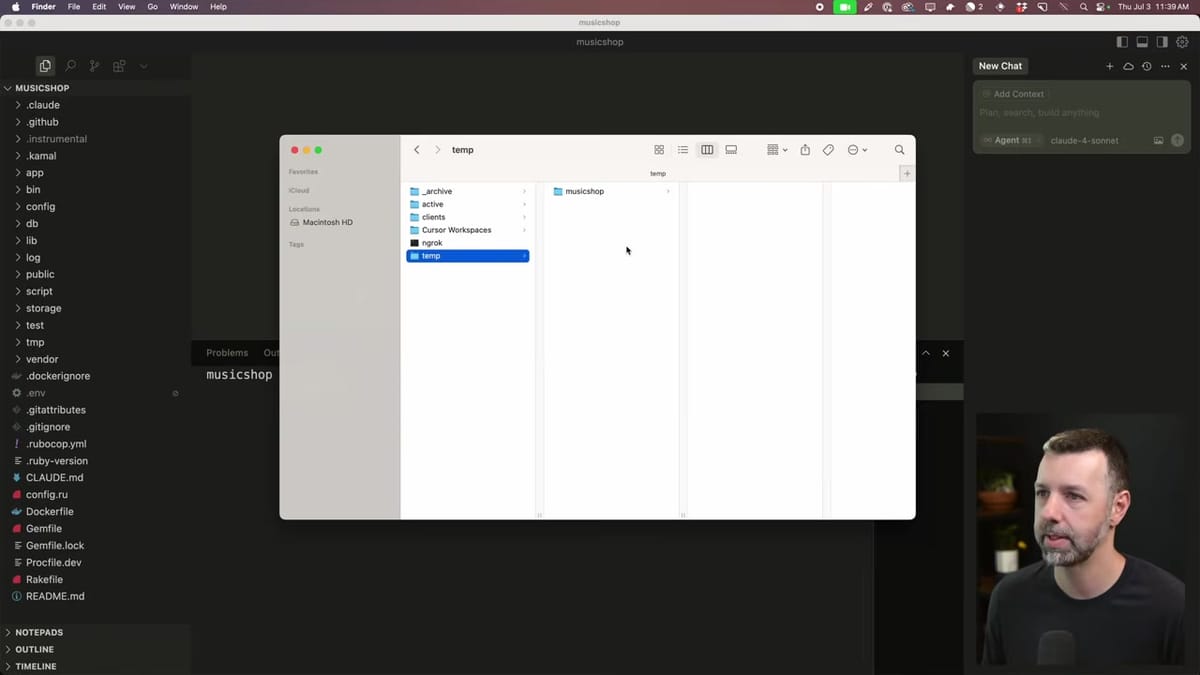
After this, the music-shop-worktrees/feature-name folder will contain a full copy of the app and will be on the feature-name branch.
List existing worktrees
git worktree listFolder organization recommendations
Keep worktrees outside the main project folder to avoid problems with nested repositories, accidental commits of copied code, and tooling that scans directories recursively. A recommended structure:
projects/
  music-shop/
  music-shop-worktrees/
    drums/
    bases/
    keyboards/
This makes it easy to see the main repo and its worktrees side by side, and it prevents IDEs and automation scripts from scanning duplicate code inside the main project directory.
Automating worktree creation with Cloud Code slash commands
Cloud Code supports custom slash commands. One approach is to create a slash command that instructs Claude Code how to create a git worktree. The command should:
Determine the current project folder name.
Create a sibling worktrees folder named
<project-name>-worktreesif it does not exist.Create a new git worktree and branch using a passed argument for the branch name and folder name.
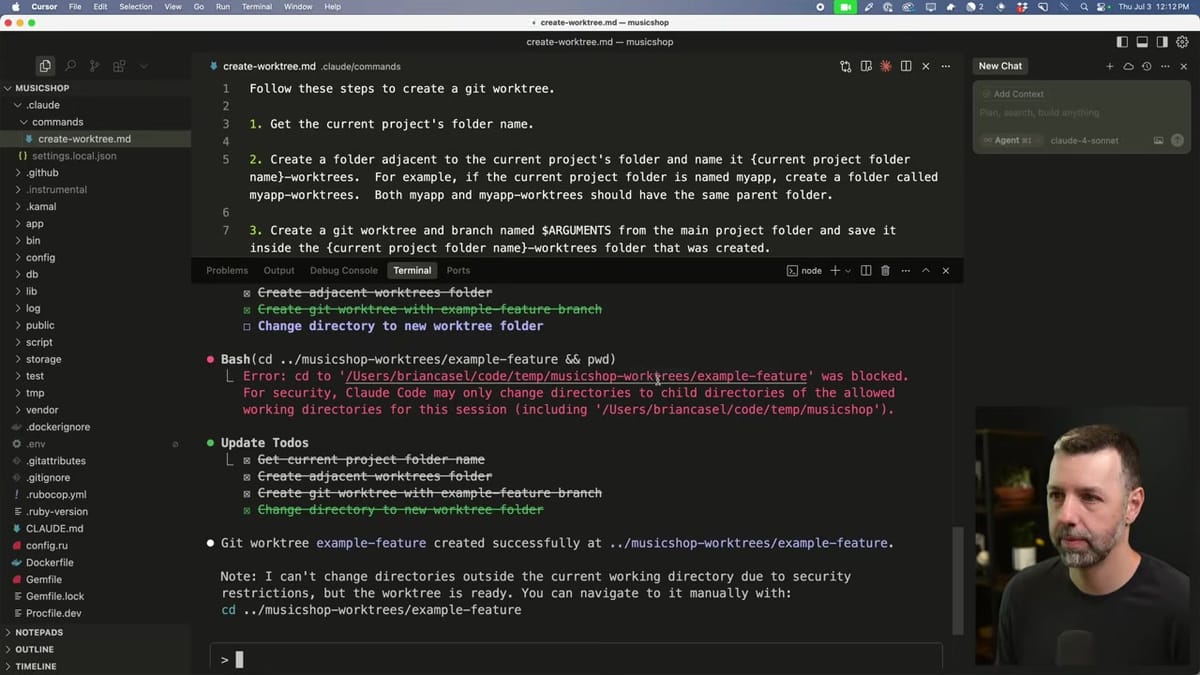
Example slash command file path and name:
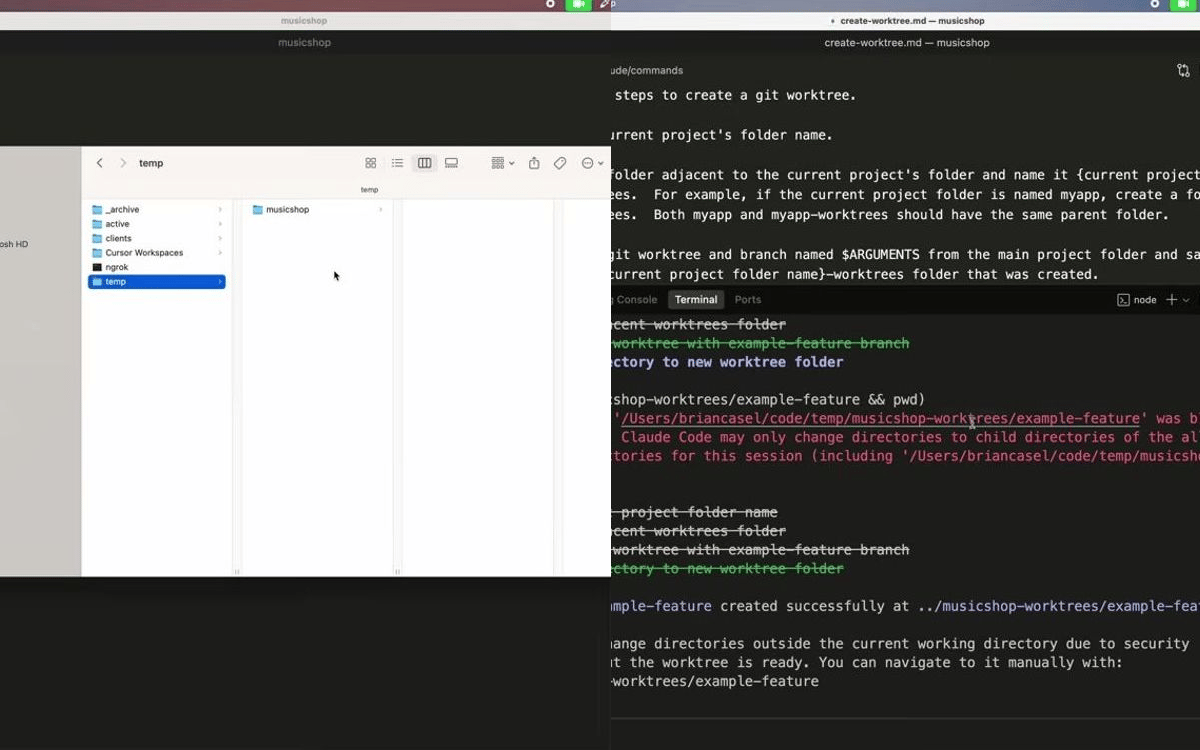
.claude/commands/create-worktree.mdThe slash command can create the worktree, but it will usually not be able to cd out of the main project folder into the new worktree directory due to editor or Cloud Code permission constraints. Expect the slash command to do the creation, but additional local automation will usually be required to open a new terminal window and switch to the new worktree.
Why a Cloud Code slash command may be limited
Cloud Code often runs within the current project folder and lacks permission to navigate out to arbitrary paths on the host filesystem. The slash command can create the new worktree location, but it frequently cannot open a new terminal instance or navigate the host OS to the newly created folder. Local shell automation is required for a single-step, developer-friendly experience.
Automating locally with a shell alias and script
A shell alias that wraps a script will create the worktree, copy essential hidden files, open the folder in the editor, and optionally open a new terminal window. The alias should accept a branch name argument. Example alias named WT could be placed in .zshrc or .bashrc.
Behavior to implement in the script
Create sibling
-worktreesfolder if missing.Create a git worktree and a new branch using the provided name.
Copy critical hidden files that are not duplicated by default into the worktree, for example
.env,.claude, and editor or tool config folders.Open the new worktree directory in the chosen editor or terminal application.
Show a success message with the new worktree path and branch name.
Example Zsh script with inline comments
The following is a sample script that can be adapted. It includes comments above each line for clarity. Adjust editor, terminal commands, and copy behavior to match the local environment.
# WT - create worktree and open it
# Usage: WT branch-name

# Exit on error
set -e

# Get branch name from argument
BRANCH="$1"

# Resolve current project folder name
PROJECT_DIR="$(pwd)"
PROJECT_NAME="$(basename "$PROJECT_DIR")"

# Worktrees parent folder adjacent to the project
WORKTREES_PARENT="$(dirname "$PROJECT_DIR")/${PROJECT_NAME}-worktrees"

# Create parent directory if missing
mkdir -p "$WORKTREES_PARENT"

# Destination folder for the new worktree
DEST="$WORKTREES_PARENT/$BRANCH"

# Create the git worktree with a new branch
git worktree add -b "$BRANCH" "$DEST"

# Copy .env if present
if [ -f ".env" ]; then
  cp .env "$DEST/.env"
fi

# Copy selected hidden folders into worktree if they exist
for d in .claude .cursor .agent-os; do
  if [ -d "$d" ]; then
    cp -R "$d" "$DEST/$d"
  fi
done

# Open the new worktree in the editor (example: open with Cursor or VSCode)
# Replace 'code' with 'open -a Cursor' or similar on macOS if using Cursor
code "$DEST"

# Optional: open a new terminal window and cd into the worktree
# Example for macOS with iTerm2 or Terminal. Adjust as needed.
# osascript -e 'tell application "Terminal" to do script "cd \"'"$DEST"'\"; clear"'

echo "Worktree created at: $DEST"
echo "Branch: $BRANCH"
Customize the editor open command and the terminal automation to fit the operating system and preferred tools. The example uses code for Visual Studio Code. Replace with the Cursor open command or the appropriate application.
Copying .env and hidden folders
By default, git worktree will not copy certain local-only files or folders to the worktree. Common items to ensure are present in the worktree:
.envto provide environment variables used by local development.Tooling folders such as
.claudeor.cursorto preserve agent rules and settings.Any other local tool or config folder that the agent relies upon to run properly.
Copy these explicitly in the script so each worktree is ready to run Claude Code without additional setup steps.
Spinning up multiple Claude Code agents
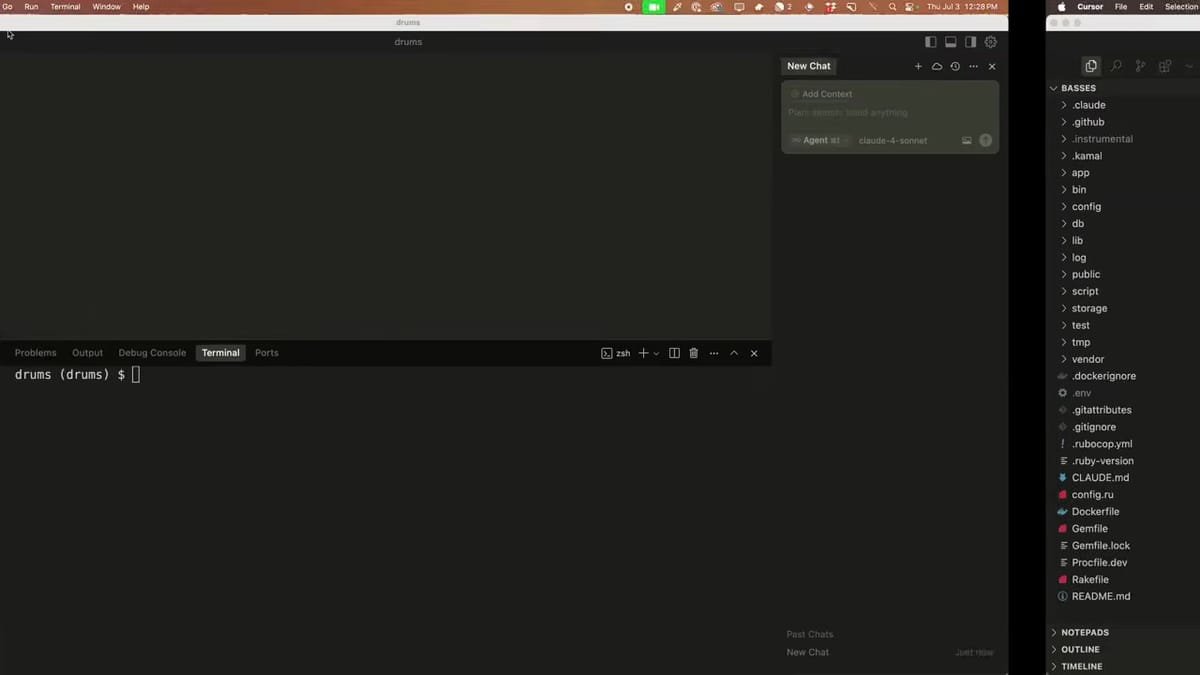
Once multiple worktrees have been created, open a separate editor or terminal window for each worktree and launch Claude Code in each. Each instance will operate on its own branch and its own copy of the files.
Example workflow for three features
Run
WT drumsto createdrumsworktree and branch.Run
WT basesto createbasesworktree and branch.Run
WT keyboardsto createkeyboardsworktree and branch.Open each worktree in its own window, then start Claude Code in each window and pass the specific task prompt to each agent.
Each agent can run migrations, generate resources, and start a local server independently from the others.
Running multiple local servers on separate ports
When each worktree runs a development server, bind each server to a distinct port to avoid collisions. For example, if the main project server uses port 3000, use different ports such as 3002, 3003, 3004 for worktrees.
# Example Rails aliases
# main project: rails server -p 3000
# drums worktree: rails server -p 3002
# bases worktree: rails server -p 3003
# keyboards worktree: rails server -p 3004
Each server will use a separate development database instance if configured to do so. Confirm database settings and create separate users if necessary for isolated local databases per worktree.
Commit, merge, and resolve conflicts
When each agent finishes work, commit inside the worktree branch. Then merge the branch back into the main branch. Typical steps:
In the worktree:
git add .
git commit -m "Add drums"
Switch to the main repository folder:
cd ../music-shop
git checkout main
git pull
Merge the worktree branch into main:
git merge feature-branch-nameResolve merge conflicts as needed and commit the resolution.
Conflicts can occur if multiple worktrees change the same lines or the same files like a shared navigation. Resolve conflicts the same way as with team members. After merging, run the main project's server and integration checks to confirm everything works together.
Removing worktrees and cleanup
When finished with a worktree, remove it to reclaim disk space. Two steps are recommended:
Remove the worktree reference from git:
git worktree remove path/to/worktreeDelete the worktree folder from the filesystem if not removed automatically:
rm -rf path/to/worktreeConfirm branches have been merged and pushed if necessary before deleting a worktree.
Tips and best practices
Organize worktrees by project: Store sibling
-worktreesfolders next to each project folder, not inside the project folder.Copy essential hidden files: Ensure
.env,.claude, and other tool configs are copied into each worktree so agents start with the expected settings.Use editor windows per worktree: Open each worktree in a separate editor window so each Claude Code instance has its own context.
Run servers on different ports: Avoid port collisions by assigning unique ports for each worktree server.
Automate safely: Test the worktree creation script with a sample repo before adding it to dotfiles. Adjust the script for different shells, editors, and OS specifics.
Handle merges as with human collaborators: Expect conflicts and treat agent contributions the same way as teammate contributions.
Example quick reference commands
Action | Command |
|---|---|
Create worktrees folder |
|
Create worktree and branch |
|
List worktrees |
|
Remove worktree |
|
Merge branch into main |
|
Final notes and recommended next steps
Using Git worktrees along with a small local automation script enables running multiple Claude Code agents in parallel without file conflicts. Start by practicing with a simple repo, create a script or alias to standardize worktree creation, and incorporate copying of needed hidden files so each worktree is production-ready. Once comfortable, integrate this workflow into regular development routines for faster, parallel agent-driven development.
Watch the full video here:
Related Articles

Best Wireless Routers 2025 - Buyer's Guide
An example "best of" Amazon buyer's guide generated by an agent in Publish Owl. Find the best metal detector on Amazon based on Perplexity's research!

1968 Dodge Charger Facts: Design, Specs, and Legacy
1968 Dodge Charger facts you may or may not know. Content was researched and generated by a GPT-5 agent in Publish Owl.

Anything AI Review: Can This No-Code AI App Builder Deliver on Its Promise?
Anything AI review by Publish Owl. This review explores its features, ease of use, and autonomous testing capabilities, helping you decide if it’s the right tool for your development needs.